

Sprinter Van Floor Removal & Rust Treatment
September 21, 2026
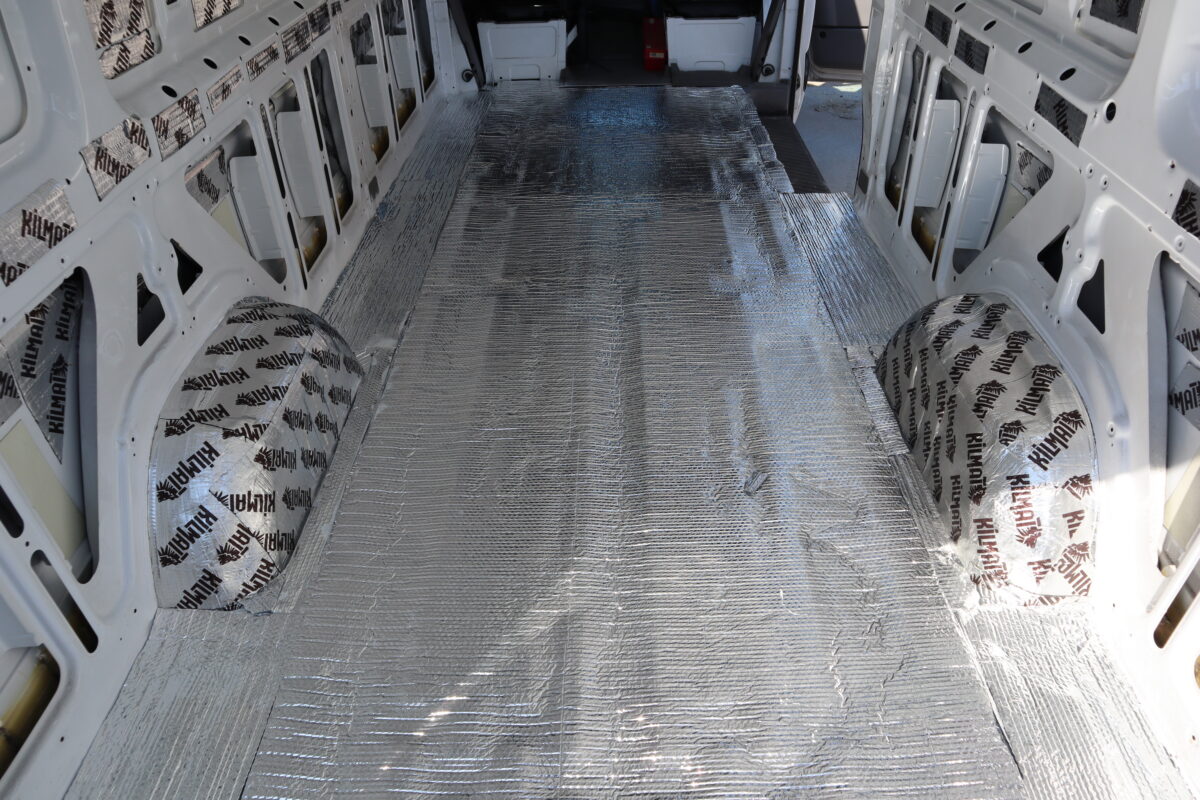


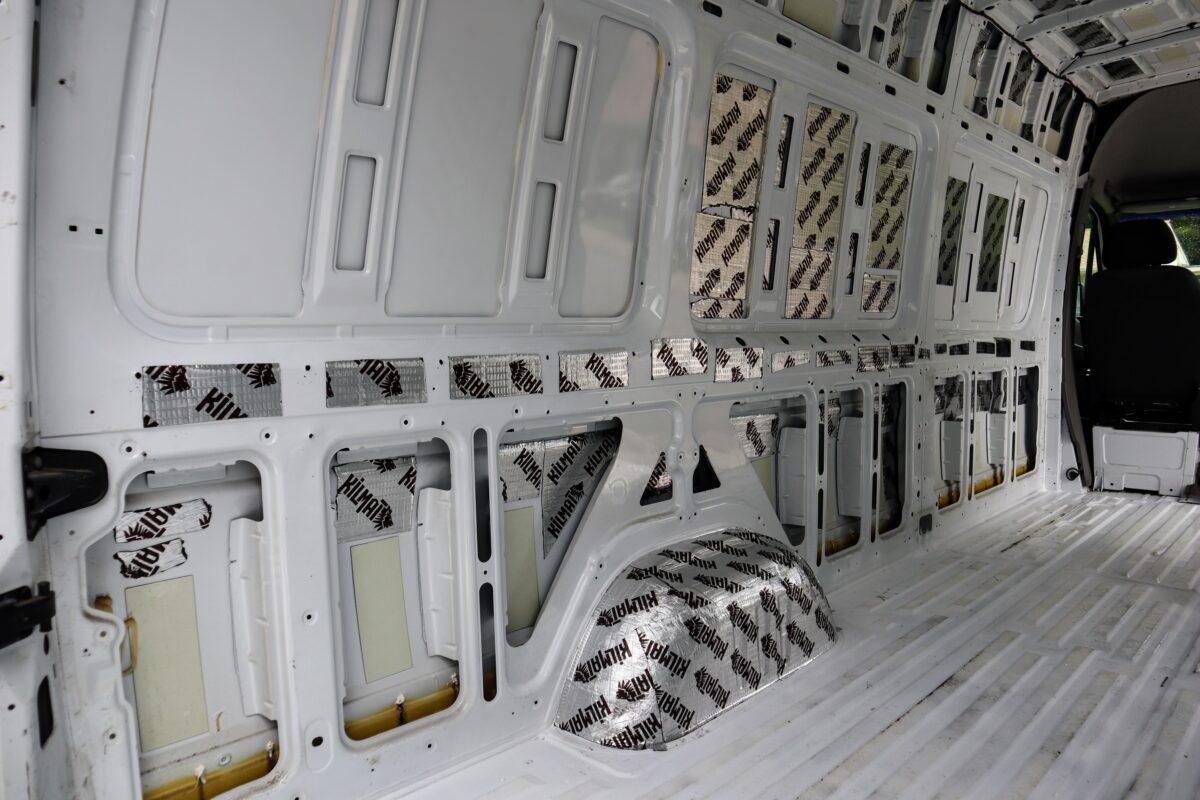





Welcome back to day three of our DIY van build! Today, we are tackling a crucial interior project. We are officially installing our Sprinter van sound deadening material. If you have ever driven an empty cargo van, you know it sounds exactly like a giant tin can. Consequently, we have to eliminate that loud road noise before we can add our walls.
We want our van to feel like a quiet home. Therefore, we are documenting our entire installation process so you can learn from our experience. Let’s dive right into the project!
There are countless soundproofing products on the market right now. Some builders swear by Boom Mat, while others prefer FatMat. However, after doing extensive research, we ultimately decided to use Kilmat.
We chose Kilmat because it boasted the best overall reviews. Furthermore, it offered the absolute best price. We paid roughly $57 for a single box. This cost equals out to about $1.25 per square foot. We ordered two full boxes just to be safe. Also, you must remember that the heavy wooden application rollers are sold separately.
Before you stick anything to the walls, you must thoroughly clean the bare metal. If you skip this step, your expensive adhesive will peel right off. We initially wiped down the panels with basic glass cleaner. Next, we switched to rubbing alcohol to guarantee a perfectly clean surface.
Right before we started applying the mats, we took our van for a test drive. We drove in tight circles down a local gravel road. We recorded the audio because we wanted a true before-and-after baseline of the road noise.
Installing Kilmat feels exactly like placing giant foil stickers all over your van. The adhesive backing is extremely aggressive. Because we were working in the intense New Orleans heat, the paper backing peeled off effortlessly. However, this heat also made the black tar incredibly messy.
We highly recommend wearing thick work gloves for your Sprinter van sound deadening project. The edges of the foil are razor-sharp. Also, the black adhesive easily gets trapped under your fingernails.
During the process, we actually made a frustrating rookie mistake. We accidentally covered a large side panel with Kilmat. We completely forgot that we plan to cut a window hole in that exact spot! Always mark your future window cutouts before you begin sticking mats to the walls.
The Kilmat features a unique foil surface covered in tiny, raised air bubbles. This creates a brilliant visual guide for the installer. When you firmly press your heavy roller over the mat, the foil flattens out completely.
Consequently, you instantly know which spots require more pressure. Using the roller is easily the most exhausting part of the entire Sprinter van sound deadening job. However, smoothing down those sharp edges guarantees long-term adhesion.
Applying the sticky mats to the side walls was fairly straightforward. Conversely, working on the ceiling was a miserable experience. Rolling heavy mats directly above your head is incredibly tiring.
We also focused heavily on wrapping the rear tire wells. The wheel wells act like giant metal drums that amplify noise into the cabin. Therefore, we used about seven full sheets of Kilmat on each individual wheel well to muffle the sound.
Overall, this Sprinter van sound deadening project took us exactly three and a half hours. We successfully covered the entire ceiling, all the side walls, and both rear tire wells. We decided to skip the floor because we plan to use Reflectix instead.
We utilized one complete box of Kilmat and about seven extra sheets from our second box. The difference in the acoustics is absolutely stunning. When you knock on the bare metal now, it responds with a dull, solid thud.
This was a tedious, exhausting day in the deep southern heat. Still, the peaceful quiet we achieved was entirely worth the effort[cite: 2]. Tomorrow, we are finally upgrading the exterior by installing our brand new front grille[cite: 2]. Be sure to subscribe and follow along as our DIY van build continues!